Teaching your dog to shake hands is an enjoyable and polite trick that showcases their ability to understand and execute commands. With a little patience, high-value treats or a clicker, you can reinforce this behavior without using forceful methods, such as manually lifting your dog’s paw. In this guide, we’ll discuss dog training techniques for teaching your dog to shake hands. You’ll learn how to present your hand to your dog, when to click or praise their actions, and how to build up the duration of paw contact before introducing a verbal cue.
How to Teach Dog to Shake
- Training your dog to shake hands requires patience, high-value treats, and reinforcement without forceful methods.
- Learn how to present your hand properly to elicit the desired response from your dog.
- Use a clicker or verbal praise to reinforce your dog’s actions and help them associate a treat with the command.
- Practice consistently and gradually increase the difficulty of the task to ensure your dog becomes confident in performing the trick.
- Positive reinforcement is an essential part of dog training, as it helps your dog understand which behaviors are desired and rewarded.
- Create a comfortable and quiet training environment with minimal distractions for optimal results.
- Once your dog masters shaking hands with one paw, remember to teach them to shake with the other paw as well.
Introduction to Dog Handshake Training
As a dog owner, one of the most rewarding experiences is teaching your furry friend new tricks. The dog handshake is considered an advanced trick that goes beyond the basic commands of sitting and staying. Not only is it engaging and entertaining for both you and your dog, but it also serves practical purposes, such as cleaning muddy paws or preparing for nail trimming.
To enjoy success with your dog handshake training, you should aim for a routine daily practice of 5-10 minutes. This frequency ensures that your dog remains engaged and doesn’t get too frustrated or tired. Patience and consistency are essential, as well as using positive reinforcement dog training techniques.
Among the effective methods for teaching a dog to shake, clicker training has gained considerable popularity. This approach involves using a clicker device to mark the exact moment when your dog exhibits the desired behavior. As the training progresses, your dog will associate the sound of the clicker with the correct action and, ultimately, the reward.
By taking time to practice and applying these effective methods for teaching your dog to shake, you’ll enhance the bond between you and your canine companion, while also imparting a delightful and useful skill.
The Basics of Positive Reinforcement for Dogs
When it comes to teaching dogs new tricks like shaking hands, one of the most successful strategies for teaching a dog to shake is to implement a positive reinforcement dog training approach. This method focuses on rewarding the desirable behaviors instead of punishing undesired ones, making it more effective and enjoyable for dogs and their owners.
Understanding Positive Reinforcement
Positive reinforcement training emphasizes the use of rewards, such as treats or praise, to make certain behaviors more likely to occur in the future. When teaching a dog to shake, for example, you would reward your pet immediately after they raise their paw to touch your hand. Over time, this reinforcement strengthens the dog’s understanding of the action, helping them associate the reward with the correct behavior. This approach results in a happy, well-mannered pet.
Choosing the Right Treats for Training
When it comes to choosing training treats for your dog, this selection process can hugely impact the success of your training sessions. Treats should be relatively small to prevent overfeeding and ideally something that your dog is highly motivated to receive.
In addition to store-bought treats, you can also consider homemade options like small pieces of cooked meat, or various dog-safe fruits and vegetables. Just be sure to avoid feeding your dog toxic foods such as chocolate, grapes, and onions.
Setting the Right Training Environment
The environment in which you train your dog plays a crucial role in their ability to learn new commands. To optimize the setting for training your dog to shake, aim for a quiet and comfortable area that minimizes distractions. This helps your dog stay focused and receptive to learning.
As your dog becomes proficient in performing the trick, you can then gradually incorporate more distractions by practicing in different settings. This way, your pet will be able to shake successfully, no matter the environment.
Step-by-Step Guide to Teach Your Dog to Shake
Teaching your dog to shake hands is a fun and engaging activity that helps strengthen your bond and improve their obedience skills. Follow this step-by-step guide to effectively teach your dog the handshake trick using a positive and rewarding training process.

Step 1: Ensure your dog knows basic commands
Before you begin the dog handshake training process, make sure your dog is familiar with basic commands such as “sit”, “stay”, and “come.” It will make the training process smoother and give your dog a solid foundation for learning advanced tricks.
Step 2: Choose a verbal cue and hand gesture
Select a verbal cue like “paw” or “shake” and a specific hand gesture to accompany it. The cue and gesture should be consistent throughout the training process, which will help your dog understand and respond to your commands accurately.
Step 3: Present the treat and command
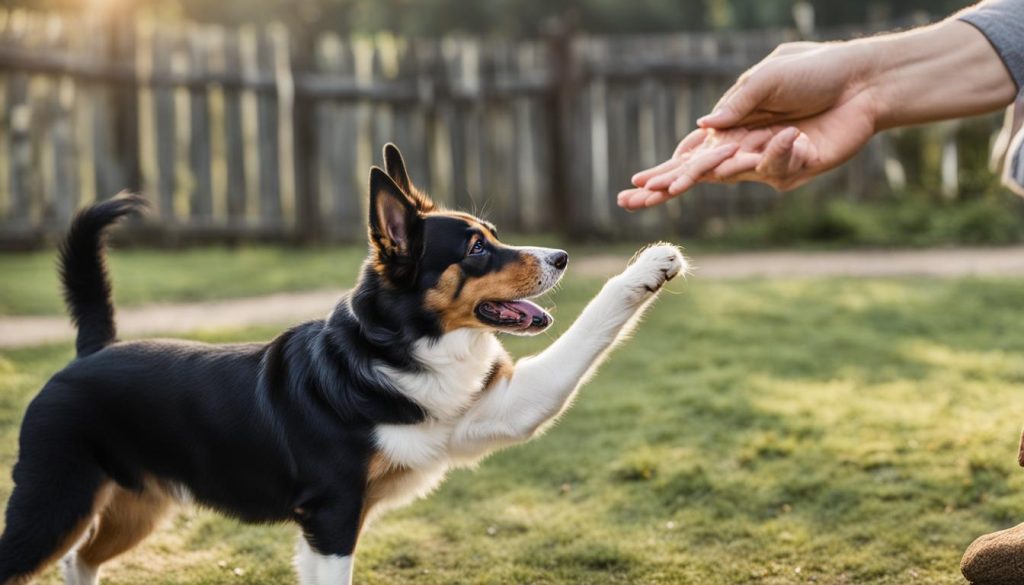
Ask your dog to sit and present a treat in your hand without giving it to them. Hold your hand close to their paw, say the verbal cue, and perform the hand gesture. This will get their attention and encourage them to inspect your hand, making an effort towards the desired action.
Step 4: Reward the effort
When your dog touches your hand with their paw, immediately offer praise and give them the treat. This positive reinforcement will help them associate the action of shaking with the verbal cue and gesture.
Step 5: Gradually increase the task complexity
As your dog becomes more comfortable with the handshake and shows consistency in offering their paw, gradually increase the complexity of the task. To do this, hold your hand higher, so they need to lift their paw more to reach your hand. Praise and reward them for their progress with each new level of complexity.
Step 6: Practice and maintain consistency
Consistent practice is essential for a successful training process. Train your dog regularly, for short sessions of 5-10 minutes daily, until they confidently offer their paw upon command. Maintain consistency in the verbal cue, hand gesture, and rewards to reinforce the behavior and ensure lasting success.
By following this step-by-step guide to teach your dog to shake, you will provide an enjoyable and rewarding experience for both you and your furry companion—one that showcases your dog’s intelligence and obedience while enhancing your bond.
Training Your Dog to Shake with Both Paws

To fully engage and impress with your dog’s handshake trick, it’s important to teach them to offer both paws for a shake. The following techniques and considerations will help you ensure consistency and maintain a positive training environment while working on this advanced skill.
Techniques for Teaching the Other Paw
When training for both paws handshake, keep in mind that dogs do not generalize like humans. It’s important to teach each paw separately and consistently. Reward your dog for using the paw closest to the hand you offer, reinforcing the desired action. If your dog uses the wrong paw, simply wait without correcting until they offer the correct one and consistently practice with each paw.
Handling Confusion and Overcoming Obstacles
Occasionally, your dog may show confusion or fail to respond to the handshake cue during the tricks for training your dog to shake. In these instances, return to the last successful step and reinforce it before trying to advance. Be patient and avoid frustration, encouraging your dog when they struggle. Disregard incorrect attempts and maintain a positive demeanor, helping to overcome obstacles in dog handshake training.
Ensuring Consistency in Training Across Both Paws
Consistency is key in shake command training consistency. Use the same command for each paw or consider a different command for the opposite paw if preferred. Reward only when your dog completes the command successfully to prevent confusion and ensure they respond appropriately without relying on treats. By maintaining consistency and patience throughout training, you’ll be able to teach your dog to shake with both paws and demonstrate their impressive new skill.
READ: How to Teach Your Dog to Lay Down: Simple Steps
Conclusion
Teaching your dog to shake hands with both paws is a testament to successful communication and the bond between you and your dog. Utilizing successful strategies for teaching dog to shake and following easy ways to teach dog to shake will not only reinforce obedience but also enhance your dog’s confidence and offer a delightful trick to showcase.
Patience, consistency, and positive reinforcement are critical elements in achieving this training milestone. It is important to maintain a positive demeanor and encourage your dog throughout the process, disregarding incorrect attempts while rewarding only when the dog completes the command successfully. This helps prevent confusion and ensures your dog responds appropriately without relying solely on treats.
In summary, teaching your dog to shake hands is an engaging and enjoyable experience that demonstrates their ability to understand and perform commands. With dedication, practice, and the application of positive reinforcement techniques, your dog will be proudly offering their paw in response to your cues, showcasing your successful training and the strength of your bond.
FAQ
How long should each training session be for teaching my dog to shake hands?
Training sessions should be kept short, ideally between 5-10 minutes, to prevent your dog from becoming frustrated or tired. Always end the session on a positive note, and you can have multiple sessions throughout the day.
Can I use a clicker for teaching my dog the handshake trick?
Yes, you can use a clicker as a form of positive reinforcement while training your dog to shake hands. The clicker helps strengthen the dog’s understanding of the correct behavior by precisely marking the desired action.
What kind of treats should I use for handshake training?
The treats should be bite-sized and chosen according to your dog’s preferences, such as soft or hard treats and motivational flavors. Homemade options like small pieces of cooked meat or certain fruits and vegetables could also be used. Avoid toxic foods like chocolate, grapes, and onions.
How can I ensure my dog responds to the shake command without relying on treats?
Consistency in training is crucial to achieve this. You should only reward your dog when they complete the command successfully. As your dog becomes more reliable in responding to the command, you can gradually decrease the frequency of treats while still praising and encouraging your dog.
My dog seems to struggle or confuse the handshake cue. What should I do?
If your dog experiences confusion, return to the last successful step and reinforce it before attempting to advance again. Be patient and avoid frustration, offering encouragement when your dog struggles. Disregard incorrect attempts and maintain a positive demeanor throughout the training process.


